Friday, December 27, 2013

Merry Christmas & Happy New Year!

Happy Holidays everyone! I hope you all had a lovely holiday season filled with family and joy!

I wanted to take a moment to share with you some presents I made for friends this year!

The first being some canvas paintings!


For this project you need:

  • A canvas (or two) 
  • Letter stickers (I used big letter stickers from mambiSTICKS)
  • Paint brushes
  • Paint
  • ModPodge
  • Satin finishing spray paint
  • Glitter/fine tinsel

What to do:

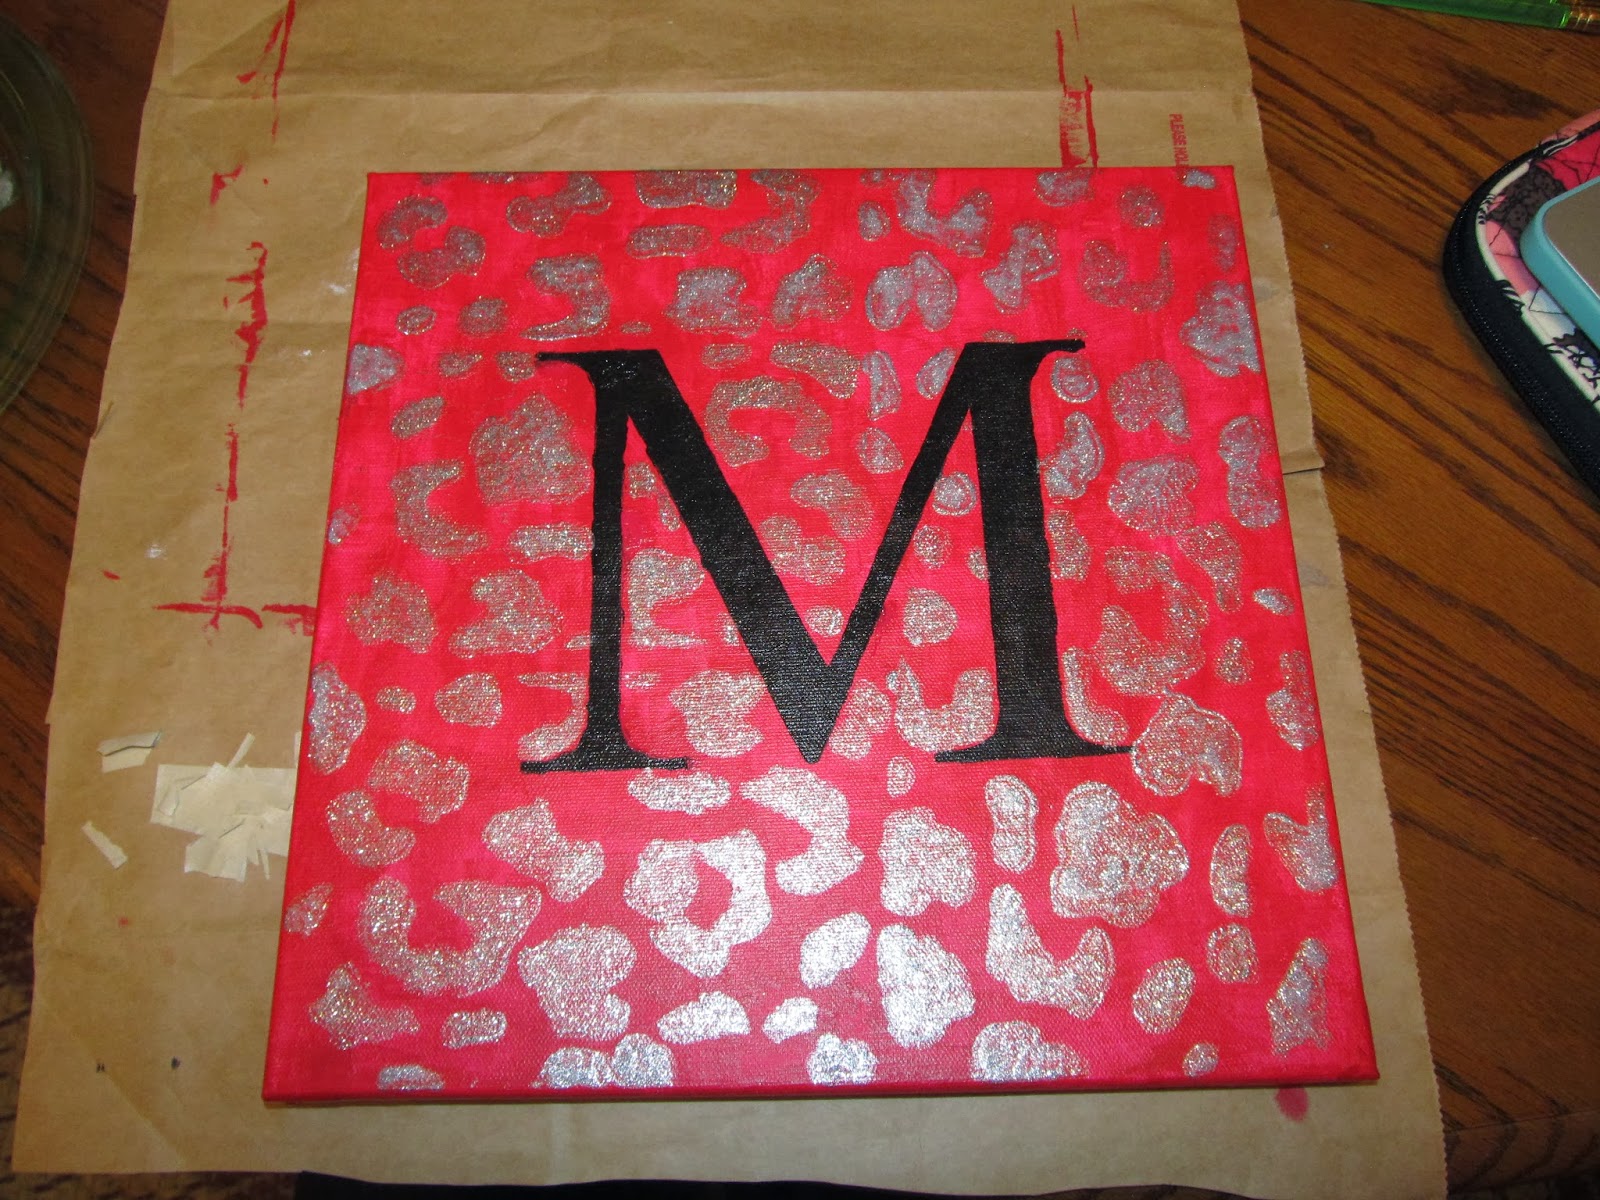
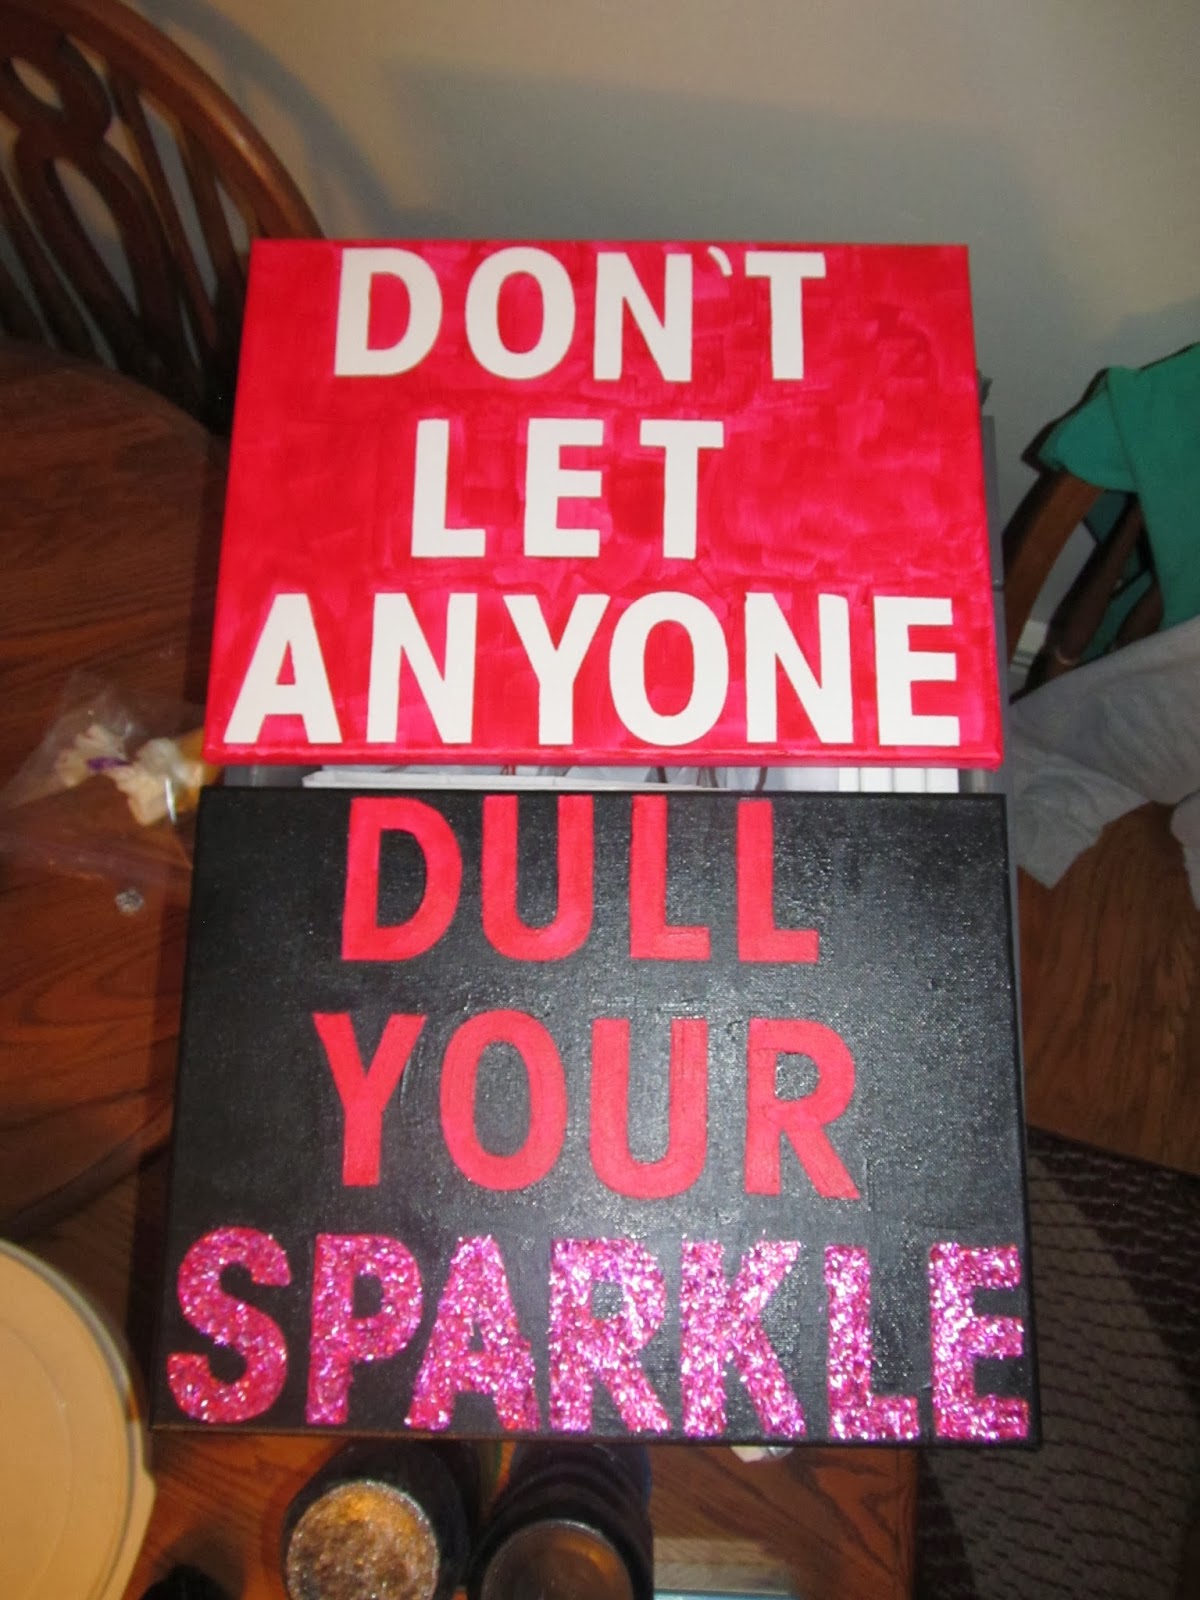
I started by cutting out all of the letters I needed and placing them where I wanted to put them. Once I made sure everything would fit right I started sticking them on. I started with the first and last letters of the word and worked my way in so that I would make sure the whole word would fit.


Then I started to paint the canvas the base color. I made sure to stroke down the letter stickers so that no paint would get underneath the sticker. After a few minutes the letters began to curl so I started to peel them off. I let the base coat dry over night.

The next day I painted the letter in (I only painted the letters on "DULL YOUR SPARKLE"). I painted all of the letters pink and let that dry for a few hours.

Later that day I painted over SPARKLE with ModPodge and put tinsel/glitter on top of the ModPodge and let it dry. I dusted off all of the extra tinsel and then sprayed over SPARKLE with finishing spray. I let it dry and then I did some touch ups on the black and painted the sides of both canvases. Once they were dry I spray them with the finishing spray and set them to dry.

And voila!

The second project I did for friends and myself this year are "Good Things" Jars.


This is a great present to make for friends, the premise of the jar is that for the new year whenever anything good or memorable happens you write it down and put it in the jar! Then at the end of the year you get together and look back on all the good things that happened!

You can decorate the jar how ever you decide! Last year I painted mine all blue and did a white detail! This year I took a different route!

What you need:

  • A mason jar (or any jar) 
  • Paint (glass or multi-purpose)
  • Paint brushes
  • Glitter spray paint
  • Painters tape 
  • Finishing spray
  • Rubbing alcohol
  • Plastic cups

What to do:

The first thing to do is to clean your jar with rubbing alcohol. This will get all the guck off and make sure that the paint goes on smoothly.


The next this to do is take the lid off and turn the jar upside down. I used plastic cups to hold my jars while I painted so that I wouldn't be getting finger prints all of the jar and to avoid making a mess. 

I painted the entire outside of the jar black and then let that dry over night.

The next day I came pack and took painters tape and created a design for each of the jars. For one I did stripes and for the other I did color block.

I took them outside and spray painted them with silver glitter spray paint.

After about an hour of sitting I went back and I sprayed them with finishing spray to keep the glitter in place. One they sat for about another 30 minutes I went back and carefully took the tape off.


I sprayed them with finishing spray one more time and let them sit until they were done drying. And ta-da! I was really happy with the way they came out and I am giving them to my two best friends for their Christmas presents! 

I hope you guys have had a great break from school and a terrific holiday season! 

Happy Crafting,
gMe

Thursday, November 28, 2013

Happy Thanksgiving!

Happy Thanksgiving!! I hope you all had a lovely day with family, friends, and good food!

Thanksgiving always emphasizes to me how blessed I truly am. I’m so grateful for the people in my life and all that I get to experience. I’m thankful for my family and my friends, I’m thankful that I get to attend college and be a student athlete, and I’m thankful for all the material things I am blessed with in this life.

Some of my favorite foods today were definitely mashed potatoes, mashed sweet potatoes with a brown sugar, pecan crumble topping, and stuffing. Carbs galore! And desserts of course! Pecan pie is a must! Apple pie as well.

My family had dinner with my best friends family and it was so much fun to celebrate thanks with one another. We had a great dinner and wonderful desserts. We watched football and Big Bang Theory, and we played the new game Heads Up! If you haven’t heard of it go to the App Store immediately and purchase it because it was well worth the dollar that it costs! It’s so much fun, especially with a good group of people! You all need to try it! We had so much fun playing!

My Thanksgiving was so great! I was with good friends and family! I saw all my high school friends! My high school football team beat our rival in the annual Thanksgiving game! And I ate a ton of delicious Thanksgiving food!

I hope you all had a lovely day! Happy Thanksgiving!

gMe

Tuesday, November 12, 2013

Let's Get Crafty - Canvas Paintings


Hello darlings,

Over this past holiday weekend I got to spend some time at home. And of course I spent that time crafting!


Here's how to make your own!

What you need (Pink cheetah print one):


- Canvas (I used 12x12)
- Paint Brush
- Acrylic Paint
- Stencil
- Stencil Paint Brush
- Finishing Spray

For the "M": 
-Card stock 
-Printer
-X-acto Knife

How to:

Step 1: I started off by laying down a cut up brown paper bag so I wouldn't get any paint on the table.
Step 2: I used a small bottle of pink acrylic paint (water based) to paint the first coat on the canvas.

Step 3: After the first coat dried, I use a tube of hot pink acrylic paint (from the painters section in Michael's) to paint the top coat.


Step 4: As the paint was drying, I used an X-acto Knife to cut the "M" stencil. I had printed the "M" from Word onto a piece of card stock (because it is thicker that regular paper). After cutting the "M" out I used the piece of paper with the missing "M" to stencil the letter onto the canvas. 


*I used black Martha Stewart acrylic paint for the M*

Step 5: I used the cheetah print stencil to add the cheetah print to the sides of the "M" with the stencil brushes. I used silver glitter Martha Stewart paint. After each use of the stencil I rinsed it off and dried it before placing it back on the canvas to add more print. 


Step 6: I used a clear finishing spray paint to seal everything in once the painting had dried over night. 

And ta-da! I made this for one of my friends, I'm going to give it to her as part of her Christmas present. 

*When painting the canvas the base color, make sure that you paint the sides of the canvas too. 


What you need (Blue/Silver Chevron): 

-Canvas (12x12)
-Silver Glitter Spray Paint
-Blue Acrylic paint
-Masking Tape
-Cardboard 
-Scissors
-Ruler
-Brown Paper Bag
-Finishing Spary

How to: 

Step 1: I started by measuring and cutting a piece of cardboard using a rule in the Chevron pattern. Since my canvas was 12x12, I had the points every 1.5 inches. 


Step 2: I used the making take to transfer the Chevron pattern on to the canvas, carefully lining us the corners to make perfect intersections. 


Step 3: I cut pieces of a brown paper bag and taped them down over the sections of the chevron that I wanted to painted blue. 


Step 4: I took the canvas outside and used the Silver Glitter Spray Paint and sprayed the canvas, including the sides. 


Step 5: After letting the spray paint dry over night, I took the piece of paper bag off the canvas. And I painted these spaces with the blue paint. 


Step 6: Once the blue paint was dry, I took the tape off the canvas. Then I took the canvas outside and sprayed it with the clear finishing spray. 

*With this the finished spray is very important because the glitter falls and rubs off if you don't spray a finishing spray on top.*


And bam! Chevron beauty!

I made this one for myself to add to my collection of crafts hanging in my dorm room! I love it!

I hope you enjoy! Happy Crafting! 
gMe


Friday, November 1, 2013

Happy November

 Morning darlings!

Hope you’re all having a lovely start to the month. Here’s to hoping it’ll be a good one!

November brings colder weather, hot chocolate and more and more football games, as well as a busy schedule as the semester’s end nears. And there are very important things you need to stay adorable and organized throughout November!

Some of my must-haves for November include:

1. First and foremost, boots!

Boots are a must-have staple in every girl’s wardrobe. Now I’m not just talking Uggs here, I mean riding boots. Riding boots have become more and more apparent over the past few years, as they should because they’re gorgeous and go with everything.

A girl can never go wrong with a tall brown leather boot. Especially with cute tall socks!

In terms of a warm outdoor boot, you can’t go wrong with Uggs but if you’re looking to mix it up a little you can always go for the Hunter’s with a liner or Bean boots. Warm and water proof!


Personally I have pair of two-toned Bandolino boots and Hunters that I love!

2. Scarvesss!

I absolutely loveee scarves! Scarves are perfect for a brisk day, you can wear a quarter zip with a scarf and you’ll be perfectly warm when its too chilly for just a sweatshirt but too warm for a jacket. Also, light scarves can complete an outfit and give you a little extra warmth for colder days.


You can find great scarves for a few bucks at stores like Love Culture, I scored this exact scarf for $8.

3. Basic shirts and dark jeans!

I love basic long-sleeve from Gap and J. Crew, they’re super cute and they look great with a pair of dark blue jeans and a scarf! I love my American Eagle jeans (skinny, clean rinse). These are my all time favorite jeans and I have two pairs of the exact same jean in the exact same wash.


4. Rugby shirts!

These are great for the fall, they’re heavier and look great with jeans for a casual but put together look or great with leggings for a cozy look!  I love the monogrammed Rugby shirts as well!


5. Totes!

I’m in love with these little monogrammed Longchamp style bags! I love having my monogram on the bag because I feel like it’s less likely that someone is going to grab it while I’m not looking and my roommate won’t ask to borrow it cause that’d just be silly! And knowing that it’s not a $150 bag takes a lot of the pressure off about not having a pen explode on the inside or spilling some coffee on it. I got mine from Marley Lilly but they no longer have the bag. I have however found similar ones on Etsy.


6. Planner!

And as far as organization goes every girl should have a planner. A Lilly planner! I love my Lilly planner; it has room to write all my assignments and all the events I have going on.


Before I say goodbye I need to inform you all of my latest discovery thanks to some of my hometown loves: Red Velvet Iced Coffee!! Next time you're at Dunkin' Donuts you must try it! It's amazing! 

I hope your November starts off lovely and that you all have wonderful days!

Happy November, may the next thirty days be filled with loveliness!!

gMe

Thursday, October 31, 2013

Lilly Letters


Over the summer, I made these wooden letters for two of my friends and myself. I have mine hanging in my dorm and people always ask me how I made it, so here’s how!

What you need:
-Wooden letter(s)
-Printed Lilly patterns
-Deco page
-Paintbrushes
-Scissors
-Paint (if you wish)
-Paper plates or newspaper

To start:

I went to Michael’s and got the three wooden letters, they’re only a few dollars each and the best thing about Michael’s is they always have coupons online so you can look one up and save 40%. While I was at Michael’s I also got paint and black flat sponge paintbrushes.

I chose Lilly Pulitzer patterns I wanted to use off Google and I printed them out. You can obviously use whatever patterns you’d like!

I started by painting the sides and the back of the wooden letters. You don’t need to paint the back but I decided I wanted to.

I cut the printed patterns into piece in the shape of the letters. As I put each into place I used quarters and other coins to keep them in place.

*Rubbing your finger over the edge of the letter onto of the paper is a good way to get an imprint of the shape of the letter so you know exactly where to cut. *


Once I had cut all the pieces and placed them where I wanted them I began to use the Deco-page to glue them in place. I made the mistake of just putting glue on top of the paper and it would slide all over the place. *So make sure you put the glue on the surface of the wooden letter and then place the paper down then glue over it.*

Once you’re done gluing all of the pieces of paper in to place, let the deco-page dry overnight and you have yourself a Lilly Letter!!


Happy Crafting!

gMe